Sometimes a person will say something that's so inadvertently humorous, it's a desperate struggle not to laugh in the poor schmo's face. This is especially important to control when you're in the business of customer service.
Many moons ago, I was employed by the cafe of our local Barnes & Noble. I quickly became an ace barista, whipping up a venti half-caf nonfat no-whip caramel mocha at 190 degrees and with two extra shots before you could even repeat that ridiculous order. We always had a mighty impressive bakery case, full of cookies, cheesecake, bars, muffins, scones, and sandwiches. Sadly, it all came pre-packaged and frozen, but hey--we did bake the cookies and scones!
Speaking of scones, I've never liked the suckers. They're either too dry or not sweet enough (or worst of all, both!) for my tastes. Not even our cinnamon scones could do it for me. I recall one lady in particular who was quite fond of our blueberry scones. However, it was extremely difficult to hold back the laughter when she would boldly demand "one blueberry sconce" with her coffee. Had I been raised more poorly, I would've replied, "We're fresh out of sconces, but we do have some lovely candelabra in the back. Can I offer you one of those?"
Anybody else see Falkor from The NeverEnding Story in this shot? I surely do.
Yep, we could count on her to bungle it every single time. No one ever corrected her, bless her heart. I'll bet she's still saying it.
This recipe didn't magically make me like scones (or sconces, if you must know), but it comes pretty close to being tolerable. They were plenty fluffy, just not quite sweet enough to meet my sugar needs. Do you have an awesome scone recipe that I should try before I pass the final verdict?
Big Blueberry Scon(c)es
(based on good ol' King Arthur Flour)
2 cups all-purpose flour
1/2 teaspoon salt
1/4 cup granulated sugar
1 tablespoon baking powder
6 tablespoons cold butter, cut into pieces
1 cup dried blueberries
2 eggs, beaten
1/4 cup vanilla yogurt
1 teaspoon vanilla
Preheat the oven to 375°F. Lightly grease a baking sheet.
Whisk the dry ingredients in a bowl. Cut in the butter until the mixture is unevenly crumbly. Gently mix the blueberries with the dry ingredients.
In a separate bowl, combine the eggs, yogurt, and vanilla. Add this mixture to the dry ingredients and stir very gently, just until combined. The dough will be quite moist, like cookie dough.
Scoop blobs about 1/4 cup in size onto the prepared sheet, leaving about 2" between each. Brush each ball of dough with a bit of milk for a nice, brown top.
Bake the scones for 20 to 24 minutes, or until lightly browned and a cake tester inserted into a scone comes out dry. Remove from the oven, and serve warm. I required abundant blueberry jam to make mine palatable.
SEE YOU NEXT YEAR!
December 28, 2009
December 22, 2009
playing favorites
Fact: I prefer brown sugar over white sugar. I’ve been known to dig into a bag of brown sugar with a spoon, but I can’t even imagine doing such an act with white sugar. For this reason, I find it a great tragedy that so much of the world has never tasted brown sugar pie.
This is a creation intended for people possessing a powerful sweet tooth. Folks who utter sentences like “It’s just so cloyingly sweet!” and “Those made my teeth hurt!” need not apply. Essentially, what you’ll find with this pie is a soft, creamy, custardy filling replete with rich brown sugar flavor.
As my grandma (the source and frequent baker of this recipe) can attest, the appearance of the pie that comes out of the oven isn’t always predictable. Sometimes it can be runny, while other times it sets up just perfectly. Sometimes there are pock-marks along the surface, while other times it’s completely crater-less.
Regardless of how it looks, though, one thing remains constant—the flavor. Athin thick slice of this sweet treat is a welcome and fitting conclusion to any meal.
As this recipe has been handed down from my dearest grandmother and definitely counts as a family favorite, I'm sending it along to Lynda of Lynda's Recipe Box for the "Family Recipes: Memories of Family, Food and Fun" event.
Brown. Sugar. Pie.
(a recipe from Granny Frannie!)
3 cups brown sugar, light or dark, tightly packed
1 tablespoon all-purpose flour
1/2 teaspoon salt
1/2 cup margarine or butter, melted and slightly cooled
3 eggs, beaten well
1 teaspoon vanilla extract
1 cup milk
2 regular 9-inch pie crusts or 1 deep-dish pie crust, unbaked
Prepare the pie crusts per package instructions, or make up your own favorite dough.
In a large bowl, combine the brown sugar, flour, and salt. Be sure to break up any clumps of brown sugar. In a smaller bowl, mix together the melted margarine, beaten eggs, vanilla, and milk; beat well. Add this wet mixture to the brown sugar mixture and blend very well with a handheld mixer. Pour into the pie crust(s) and bake at 350F for about 30 minutes for a regular crust, 60-70 minutes for a deep-dish crust, or until set (just a wee bit wobbly) in the middle. Let cool completely before slicing and serving.
HAPPY HOLIDAYS to you and yours!
This is a creation intended for people possessing a powerful sweet tooth. Folks who utter sentences like “It’s just so cloyingly sweet!” and “Those made my teeth hurt!” need not apply. Essentially, what you’ll find with this pie is a soft, creamy, custardy filling replete with rich brown sugar flavor.
As my grandma (the source and frequent baker of this recipe) can attest, the appearance of the pie that comes out of the oven isn’t always predictable. Sometimes it can be runny, while other times it sets up just perfectly. Sometimes there are pock-marks along the surface, while other times it’s completely crater-less.
Regardless of how it looks, though, one thing remains constant—the flavor. A
As this recipe has been handed down from my dearest grandmother and definitely counts as a family favorite, I'm sending it along to Lynda of Lynda's Recipe Box for the "Family Recipes: Memories of Family, Food and Fun" event.
Brown. Sugar. Pie.
(a recipe from Granny Frannie!)
3 cups brown sugar, light or dark, tightly packed
1 tablespoon all-purpose flour
1/2 teaspoon salt
1/2 cup margarine or butter, melted and slightly cooled
3 eggs, beaten well
1 teaspoon vanilla extract
1 cup milk
2 regular 9-inch pie crusts or 1 deep-dish pie crust, unbaked
Prepare the pie crusts per package instructions, or make up your own favorite dough.
In a large bowl, combine the brown sugar, flour, and salt. Be sure to break up any clumps of brown sugar. In a smaller bowl, mix together the melted margarine, beaten eggs, vanilla, and milk; beat well. Add this wet mixture to the brown sugar mixture and blend very well with a handheld mixer. Pour into the pie crust(s) and bake at 350F for about 30 minutes for a regular crust, 60-70 minutes for a deep-dish crust, or until set (just a wee bit wobbly) in the middle. Let cool completely before slicing and serving.
HAPPY HOLIDAYS to you and yours!
December 17, 2009
a gustatory conflict
Have you ever seen someone knock back a shot of melted butter? I have.
It was at Red Lobster (home of some cheese biscuits that'll make ya want to skip the rest of the meal), and it was repulsive. Don't get me wrong--I enjoy butter as much as the next gal, but witnessing that scene made me squirm in my seat.
On a semi-related note, I was recently reminded of one of my favorite candies when I was growing up--butter rum lifesavers. I really loved their rich flavor. I can recall hearing about a beverage called hot buttered rum and because I want to know everything, I looked up its description. Imagine my surprise (and initial disgust) when I learned that it’s made by beating together butter, brown sugar, and spices and melting this mixture into a combination of rum and hot water. To my mind, that doesn’t sound like a very far cry from taking down a shot of melted butter. Have any of you had hot buttered rum? Is it not as nauseating as I think?
I was recently given a little bottle of butter rum flavoring, and I decided to try it out in some mega-muffins. Would they taste wonderful like those lovely little lifesavers, or would they turn my tummy inside out and upside down like a dose of tepid fat?
Good news--they’re delicious. The flavor is subtle, but not too understated that you don’t immediately think buttah upon taking a bite. The moral of this post? For once I actually like an artificial flavor much, much more than the real thing. Yes, when it comes to butter rum, I think I’ll stick with candy and baked goods and leave the cocktails (and shots o’ pure fat) to the morepsychotic daring among us.
Better-Than-a-Shot-of-Butter Butter Rum Muffins
(alternately, Artificially-Flavored-and-Proud-of-It Butter Rum Muffins)
(based on these beauties)
Muffins:
1/2 cup butter, softened
1/2 cup sugar
2 eggs
2 cups flour
2 teaspoons baking powder
1/2 teaspoon salt
1/8 teaspoon ground cloves
1/8 teaspoon cinnamon
1/2 cup milk
1/2 teaspoon butter rum flavoring
Glaze:
1/4 teaspoon butter rum flavoring
3 tablespoons sugar
milk, if needed
Preheat oven to 375 degrees F. Grease or line 12 regular muffin cups or 6 mega-muffin cups.
Beat the butter with an electric mixer until creamy. Add the sugar and beat well. Add the eggs one at a time, beating just until blended after each addition.
Combine the flour, baking powder, salt, cloves and cinnamon in a separate bowl.
In a third bowl, combine the milk and butter rum flavoring.
Add the flour mixture to the butter mixture alternately with milk mixture, ending with flour mixture and combining only until JUST blended. Spoon the batter into the prepared pan, filling 3/4 full. Bake for 20-25 minutes for regular muffins (or 30-35 minutes for mega-muffins) or until golden. Remove from the pans immediately and cool on a wire rack.
For the glaze, combine 1/4 teaspoon butter rum flavoring and 3 tablespoons of sugar in a small saucepan; heat slowly, stirring constantly until the sugar dissolves. If the mixture gets too thick, add a little milk. Brush the glaze over warm muffins and sprinkle with coarse sugar for a tasty finish.
It was at Red Lobster (home of some cheese biscuits that'll make ya want to skip the rest of the meal), and it was repulsive. Don't get me wrong--I enjoy butter as much as the next gal, but witnessing that scene made me squirm in my seat.
On a semi-related note, I was recently reminded of one of my favorite candies when I was growing up--butter rum lifesavers. I really loved their rich flavor. I can recall hearing about a beverage called hot buttered rum and because I want to know everything, I looked up its description. Imagine my surprise (and initial disgust) when I learned that it’s made by beating together butter, brown sugar, and spices and melting this mixture into a combination of rum and hot water. To my mind, that doesn’t sound like a very far cry from taking down a shot of melted butter. Have any of you had hot buttered rum? Is it not as nauseating as I think?
I was recently given a little bottle of butter rum flavoring, and I decided to try it out in some mega-muffins. Would they taste wonderful like those lovely little lifesavers, or would they turn my tummy inside out and upside down like a dose of tepid fat?
Good news--they’re delicious. The flavor is subtle, but not too understated that you don’t immediately think buttah upon taking a bite. The moral of this post? For once I actually like an artificial flavor much, much more than the real thing. Yes, when it comes to butter rum, I think I’ll stick with candy and baked goods and leave the cocktails (and shots o’ pure fat) to the more
Better-Than-a-Shot-of-Butter Butter Rum Muffins
(alternately, Artificially-Flavored-and-Proud-of-It Butter Rum Muffins)
(based on these beauties)
Muffins:
1/2 cup butter, softened
1/2 cup sugar
2 eggs
2 cups flour
2 teaspoons baking powder
1/2 teaspoon salt
1/8 teaspoon ground cloves
1/8 teaspoon cinnamon
1/2 cup milk
1/2 teaspoon butter rum flavoring
Glaze:
1/4 teaspoon butter rum flavoring
3 tablespoons sugar
milk, if needed
Preheat oven to 375 degrees F. Grease or line 12 regular muffin cups or 6 mega-muffin cups.
Beat the butter with an electric mixer until creamy. Add the sugar and beat well. Add the eggs one at a time, beating just until blended after each addition.
Combine the flour, baking powder, salt, cloves and cinnamon in a separate bowl.
In a third bowl, combine the milk and butter rum flavoring.
Add the flour mixture to the butter mixture alternately with milk mixture, ending with flour mixture and combining only until JUST blended. Spoon the batter into the prepared pan, filling 3/4 full. Bake for 20-25 minutes for regular muffins (or 30-35 minutes for mega-muffins) or until golden. Remove from the pans immediately and cool on a wire rack.
For the glaze, combine 1/4 teaspoon butter rum flavoring and 3 tablespoons of sugar in a small saucepan; heat slowly, stirring constantly until the sugar dissolves. If the mixture gets too thick, add a little milk. Brush the glaze over warm muffins and sprinkle with coarse sugar for a tasty finish.
December 14, 2009
penuche with panache
Have you tried this thing called penuche frosting? How is it different from caramel frosting or brown sugar frosting? My quick skim of super-reliable sources (you know, things like Wikipedia and Webster's dictionary) leads me to believe that penuche is a fudge-like candy made of brown sugar, butter, and milk. Candy.
So unless you have a thick layer of fudge atop your cake*, cupcake, cookie, or brownie, I think a more fitting name for a topper made from those ingredients would be caramel, brown sugar, or penuche-like frosting--as far as I can tell, they're basically all the same.
*Actually, loving sugar as I do, the prospect of a thick layer of fudgy candy atop my cake sounds rather appealing. But I digress...
How have I gone 26 years without making caramel frosting? It's delicious, divine, decadent, and delectable. I think I've ignored this masterpiece of a cake-blanket because I've always had a bit of an infatuation with cream cheese frosting and usually opt for it over all others. Well, no more. Now it's a battle between the two as to which one most frequently applies itself directly to my derrière.
Folks, this frosting was so scrumptious that the cake beneath it became superfluous. Truth be told, that's a good thing because it really wasn't anything special. Had I not added some cinnamon chips to the batter, it would've been almost worthless. Right now I'm envisioning the glorious apple dapple cake with a smooth and creamy layer of caramel frosting instead of that simple glaze. Yes...
If you're familiar with caramel frosting or any recipe involving boiled sugar, you know how fickle the process can be. This recipe is no exception--if you don't work quickly after whisking in the powdered sugar, good luck spreading the frosting over your cake. You'll have to just eat it from the pot**. I can definitely see how it would be troublesome taking the time to frost a layer cake. Fortunately, all I had to do was dump and spread, and it worked out just fine.
**Once again, not a bad proposition.
Better than fine, actually--it seems I have a new obsession.
Applesauce Spice Cake withPenuche Caramel Frosting
(based on this recipe)
Cake:
1 stick (1/2 cup) unsalted butter, softened
1/2 cup sugar
1/2 cup light brown sugar, firmly packed
1 3/4 cups applesauce
1 egg
2 cups all-purpose flour
2 teaspoons baking soda
2 teaspoons cinnamon
1/4 teaspoon ground cloves
1 teaspoon vanilla
1/4 cup rolled oats
1 cup cinnamon chips
Frosting:
1 cup light brown sugar, firmly packed
1 stick (1/2 cup) unsalted butter
1/4 cup milk
3 cups powdered sugar
Preheat oven to 350F. Grease a 13x9-inch baking dish.
In a large bowl, cream the butter and the sugars and beat the mixture until it is light and fluffy. Beat in the applesauce and the egg. In a separate bowl, sift together the flour, baking soda, cinnamon, and cloves. Add to the butter mixture and stir until combined. Add the vanilla, oats, and cinnamon chips. Stir the batter until it is combined well and pour into the prepared dish. Bake 40-50 minutes, or until a tester comes out clean.
To make the frosting, heat butter and brown sugar over medium until the mixture comes to a boil about 2 minutes. Add the milk, stir, and bring the mixture back to a boil, then remove the pan from the heat. Let the mixture cool a bit and whisk in the powdered sugar until thickened and smooth, lightened in color, and beginning to lose its sheen. Pour the frosting onto the cake quickly before it hardens and let it cool and set before cutting.
So unless you have a thick layer of fudge atop your cake*, cupcake, cookie, or brownie, I think a more fitting name for a topper made from those ingredients would be caramel, brown sugar, or penuche-like frosting--as far as I can tell, they're basically all the same.
*Actually, loving sugar as I do, the prospect of a thick layer of fudgy candy atop my cake sounds rather appealing. But I digress...
How have I gone 26 years without making caramel frosting? It's delicious, divine, decadent, and delectable. I think I've ignored this masterpiece of a cake-blanket because I've always had a bit of an infatuation with cream cheese frosting and usually opt for it over all others. Well, no more. Now it's a battle between the two as to which one most frequently applies itself directly to my derrière.
Folks, this frosting was so scrumptious that the cake beneath it became superfluous. Truth be told, that's a good thing because it really wasn't anything special. Had I not added some cinnamon chips to the batter, it would've been almost worthless. Right now I'm envisioning the glorious apple dapple cake with a smooth and creamy layer of caramel frosting instead of that simple glaze. Yes...
If you're familiar with caramel frosting or any recipe involving boiled sugar, you know how fickle the process can be. This recipe is no exception--if you don't work quickly after whisking in the powdered sugar, good luck spreading the frosting over your cake. You'll have to just eat it from the pot**. I can definitely see how it would be troublesome taking the time to frost a layer cake. Fortunately, all I had to do was dump and spread, and it worked out just fine.
**Once again, not a bad proposition.
Better than fine, actually--it seems I have a new obsession.
Applesauce Spice Cake with
(based on this recipe)
Cake:
1 stick (1/2 cup) unsalted butter, softened
1/2 cup sugar
1/2 cup light brown sugar, firmly packed
1 3/4 cups applesauce
1 egg
2 cups all-purpose flour
2 teaspoons baking soda
2 teaspoons cinnamon
1/4 teaspoon ground cloves
1 teaspoon vanilla
1/4 cup rolled oats
1 cup cinnamon chips
Frosting:
1 cup light brown sugar, firmly packed
1 stick (1/2 cup) unsalted butter
1/4 cup milk
3 cups powdered sugar
Preheat oven to 350F. Grease a 13x9-inch baking dish.
In a large bowl, cream the butter and the sugars and beat the mixture until it is light and fluffy. Beat in the applesauce and the egg. In a separate bowl, sift together the flour, baking soda, cinnamon, and cloves. Add to the butter mixture and stir until combined. Add the vanilla, oats, and cinnamon chips. Stir the batter until it is combined well and pour into the prepared dish. Bake 40-50 minutes, or until a tester comes out clean.
To make the frosting, heat butter and brown sugar over medium until the mixture comes to a boil about 2 minutes. Add the milk, stir, and bring the mixture back to a boil, then remove the pan from the heat. Let the mixture cool a bit and whisk in the powdered sugar until thickened and smooth, lightened in color, and beginning to lose its sheen. Pour the frosting onto the cake quickly before it hardens and let it cool and set before cutting.
December 11, 2009
beau who?
Like most people, I enjoy getting free stuff. So when I was contacted by Challenge Dairy and invited to participate in an event bringing attention to their wonderful butter, I jumped at the chance. I hadn't heard of the company before since it's based in California, but I'm here to tell you that we East Coasters have been missing out!
For this challenge, a plethora of food bloggers were divided up into groups and assigned a course--appetizer, entrée, side dish, and dessert. As someone who rarely, if ever, gets or eats appetizers, that's naturally the group into which I was placed. What's more, we were sent several spices from Spice Islands to use in the dish we'd be creating, and I received one I know intimately, one I’ve heard of but never used, and one I'd never even seen (Beau Monde? What's that? In addition to being yet another example of my sheltered nature, it's also a mixture of allspice, bay leaf, celery seed, cinnamon, cloves, mace, nutmeg, black and white pepper. Just so you know.)! So yes, this was indeed a challenge.
I turned to the potato, a tuber that has never failed me. I thought it'd make an adequate, nay, excellent palette for these unfamiliar herbs and spices, and also for the butter (of course). In hindsight, I realize that the traditional preparation of these pre-meal noshes is to cut them into wedges, but I went the diced route. So the silverware might have to come out early--it's not the end of the world!
To add decadence to deliciousness (and since a fork was required anyway), I drizzled a bit of my truffle oil over the seasoned and roasted taters. 'Twas a fine touch indeed.
And in case you're wondering, Beau Monde seasoning is wonderful--it's just a random and complex blend of some great herbs and spices. Try it out!
Truffled Taters with a Tasty Twist
2 lbs potatoes, scrubbed and diced or wedged
1/4 cup Challenge Dairy butter, melted
2 teaspoons Beau Monde seasoning
1 teaspoon fennel seed
1 teaspoon ground chipotle chile, more or less to taste
salt and pepper to taste
truffle oil, to finish
Preheat oven to 450°F. Line a 15x10x1-inch baking pan with foil.
Place the cut potatoes in large bowl. Add melted butter and toss to coat well.
In a little bowl, combine the Beau Monde seasoning, fennel seed, ground chipotle chile, salt, and pepper. Sprinkle this blend over the potatoes and toss to coat evenly. Arrange the seasoned potatoes in a single layer on the prepared pan.
Bake for 30 minutes or until potatoes are tender and golden brown. Add more salt and pepper as needed and drizzle with the truffle oil before serving.
If you want to be entered for a chance to win one of five $100 gift cards, all you have to do is write a post about the sweepstakes that Challenge Dairy is running. The winner of this sweepstakes wins a pretty spectacular getaway, which you can read about here.
December 7, 2009
a possible impossibility
What you see before you is known as Impossible Pie. It's called that because there's no crust involved--it magically forms its own.
I think it should be thusly named for another reason--it's simply not possible to eat only one serving at a time.
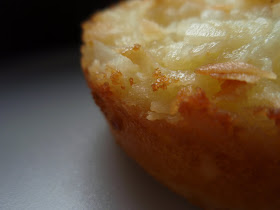
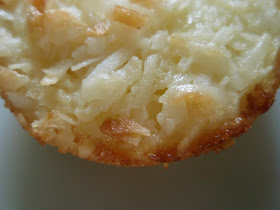
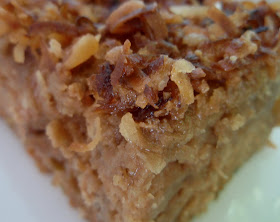
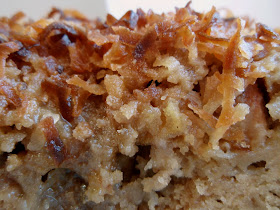
If you like coconut, you'll like this pie. There's no way around that. It's a fact. Set in stone. Done and done. The top is toasted and crunchy, the innards are creamy, and the nifty crust is chewy. It's a cinch to prepare. Did I mention that you don't have to fiddle with a crust? I actually don't mind playing with pastry, but I have to admit that it's nice to skip it every once in awhile.
I'm not sure where this recipe originated, but it's one that the great Mambino has made often and fortunately, she's trained me to make it too. It's usually formed into one regular-sized pie, but in this instance, little baby tarts seemed the ideal way to go. You'd think they'd make nice, individualized portions, but as I mentioned, it's IMPOSSIBLE to stop with just one serving. If you can resist, you're a stronger person than I.
Impossible Pie
(from Mamster)
3 eggs
1/4 cup butter, melted and slightly cooled
1/2 cup self-rising flour
1 3/4 cup sugar
1 1/2 cups milk
2 cups flaked or shredded coconut
1 teaspoon vanilla
pinch of salt
Preheat oven to 350°F. Grease a 10-inch pie plate or a muffin tin with cooking spray.
In a medium bowl, beat the eggs and add in the cooled, melted butter. Blend in the flour and sugar, then add the milk, coconut, vanilla, and salt and beat until thoroughly mixed. Pour into the prepared dish.
Bake 40 to 50 minutes or until the coconut becomes golden brown and a knife inserted into the center comes out clean. Be sure to cover and refrigerate any remaining pie. Yeah, right. Like there'd be any left.
December 3, 2009
it's all grandma's fault
The first time I can remember eating an Andes mint was at Christmas around 10 or 15 years ago. My grandma had gotten boxes of them for each of us, and I quickly ate my entire box and never looked back.
The box o' Andes became something of a holiday tradition for Grandma and she made them available every year. Sometimes they were special flavors (I fondly recall a toffee crunch version), but they were usually the classic mint. My love for them has never wavered.
What's your point, Grace? Get on with it already! I'll bet you've seen and probably used the creme de menthe baking chips, but did you know there was a batch of peppermint crunch baking chips as well? I had no idea until I found them in our cabinet at home--hooray for happy surprises, right? They were absolutely made for cookies, so cookies were made.
Baked correctly, the end result is a cookie that's crispy along the outer rim but chewy toward the middle--I attribute this amazing phenomenon to the brown-to-white sugar ratio. Incidentally, in my cabinets, both are (and always have been and probably always will be) the Domino Sugar brand. I must pause to thank Domino for sending me a gift card to use toward the purchase of their terrific products and also direct you to their website, where you'll find lots of great gift and recipe ideas for the holidays. Expect to see more to come in the near future.
The mint baking chips provide a smooth but subtle mint flavor (and a lovely smattering of pink) and the chocolate chips are plentiful enough to satisfy even the most ardent chocolate-lover. There's nothing cakelike about these discs, so don't expect it.
Best of all? I can get my Andes fix without raiding Grandma's stash.
Peppermint Crunch Chunkies
(based on this recipe)(these'd perfect for a cookie swap, no?)
2 sticks (1 cup) unsalted butter, softened
1 cup Domino® dark brown sugar, packed
1/3 cup Domino® granulated sugar
1 egg
2 teaspoons vanilla
1/2 teaspoon baking soda
1/2 teaspoon salt
1 3/4 cups all-purpose flour
1 cup rolled oats
1 cup Andes® Peppermint Crunch baking chips
1 cup semi-sweet chocolate chips
Preheat oven to 300° F.
Using an electric mixer, cream the butter, brown sugar and granulated sugar until fluffy (about 3 minutes). Beat in the egg and vanilla. Add in the baking soda, salt, and then flour; mix completely. Stir in the oats, Andes® Peppermint Crunch Baking Chips, and chocolate chips.
Scoop out round balls about 2 tablespoons in size for large cookies or 1 tablespoon for small cookies. Place on cookie sheets two inches apart.
Bake for 20 minutes for large cookies or 12-15 minutes for small cookies, taking care not to over-bake.
November 30, 2009
on a cake kick
Sometimes I become obsessed with certain foods. Prime example--my mission to find the best chicken wrap in all of the Capital Region.
Usually, though, the fixation is of the sweet and sugary variety. That's the case with my latest infatuation--apple cake.
In addition to my beloved apple dapple cake, I’ve recently tried two other recipes with delightful and drool-worthy results. After taking a one-tenth-of-a-second glimpse of Kate’s caramel apple cake, I decided to test it out too.
The recipe doesn’t differ much from my apple dapple cake. In fact, the only divergence is that a combination of white and brown sugar is used in both the cake and the glaze. Being a self-proclaimed apple cake connoisseur, I decided to make a few adjustments of my own. I used applesauce in lieu of most of the oil and also added a bit of whole wheat flour in place of some of the all-purpose flour. Now before you get all worked up about me trying to make this more healthy, I guess I should mention another change I made--I doubled the glaze. It’s been well-documented that I have a mean sweet tooth and I make no excuses. I doubled the glaze, dang it, and it was good.
I did one other thing about which I'm quite excited--I tossed some marshmallows into the batter. While they completely disappeared into the baked cake, a subtle hint of their flavor (a taste that I find particularly enjoyable) still remained. It's my belief that they dissolved into the cake and migrated upwards, forming a little bit of a crust on top. Yes, I'll be pulling this trick again.
Future apple cakes to try? Lisa's apple and cream cheese cake, Sandie's toffee apple upside-down cake, and Melanie's apple cider pudding cake.
Another Amazing Apple Cake
(based heavily on this recipe)
1 cup packed light brown sugar
1 cup granulated sugar
1/2 cup vegetable oil
1 cup applesauce
3 eggs
2 cups all-purpose flour
1 cup whole wheat flour
1 teaspoon baking soda
2 teaspoons cinnamon
1/2 teaspoon salt
4 Honeycrisp apples, diced
2 teaspoons vanilla
1 cup mini marshmallows
Caramel Glaze:
1/2 cup butter
1/2 cup granulated sugar
1/2 cup brown sugar
pinch of salt
1 cup milk
Preheat oven to 325F. Butter and flour a 13x9 inch pan.
In a medium bowl, beat both sugars, oil, and applesauce until well-blended. Add the eggs one at a time, beating well after each addition. Stir in the vanilla.
In a large bowl, sift together flour, baking soda, cinnamon, and salt. Gradually add the sugar mixture until just blended. Fold in the apples and pour the batter into the prepared pan.
Bake for 60-75 minutes, or until toothpick inserted in center comes out clean. Cool in the pan whilst making the glaze.
To make the glaze, melt the butter in saucepan over low heat. Stir in both sugars and salt and cook over medium low heat for 2 minutes. Add the milk and boil for 5 more minutes, stirring constantly. Poke holes in the cake with a fork or skewer. Pour on the glaze and let set.
November 24, 2009
you look awfully familiar...
Certain dishes are worthy of making and eating again and again, and they certainly shouldn't be reserved only for special occasions.
Squash casserole (or its first cousin, sweet potato casserole) is one of those dishes.
Yes, I made it last Thanksgiving. Yes, I made it several other times throughout the year. Each time it morphed a little bit more, and I must say, it's come a long way. For our shindig at work this Thanksgiving, I made a denser version and enhanced the streusel topping enhanced with coconut and pecans.
The very best part. No debate. The end.
Acorn squash was what I had on hand for this, and since it's a good bit more watery than butternut, I added some breadcrumbs into the mix. Heaven forbid I end up with a soupy casserole, am I right? I mean, what if it ruined the topping? We certainly can't have that.
Have a filling and fulfilling Thanksgiving, ya'll!
Tweaked-Over-Time Streuseled Squash Casserole
4 cups acorn squash, peeled, cooked, deseeded, destringed, and mashed
2 eggs, well beaten
3/4 cup sugar
1/4 cup milk
1/4 cup unsalted butter, melted
1 cup breadcrumbs
Topping:
1/2 cup quick oats
1/2 cup all-purpose flour
1 cup brown sugar
1/2 cup coconut
1 cup pecans, chopped
1 teaspoon cinnamon
1/2 cup unsalted butter, cold
Preheat oven to 350F. Combine all the casserole ingredients, beating well. Pour into a lightly greased 2-quart casserole dish.
Combine the dry topping ingredients. Cut in the butter with two knives or a pastry cutter until the mixture becomes crumbly. Sprinkle on top of the squash and bake for 1 hour or until the topping is browned and the center is set.
November 20, 2009
cherry, cherry, quite contrary
All right, I lied. There was a winner of the clash of the cobblers from a while back, but not because of flavor alone. No, I made one of the recipes again (thereby deeming it the winner*) solely because it was easier to throw together. Is that so wrong?
Slothdom is a frame of mind that I know all too well, but hey--sloths have to eat too!
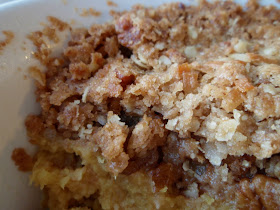
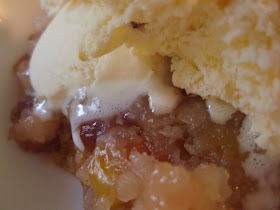
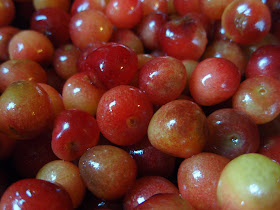
Tart cherries, soft cake, rich ice cream. The cherries are a pain to pit, but what a reward for that labor! Yeah, it goes down real nice.
*And what a coincidence that it happens to be the recipe from the Pioneer Woman herself, Ree Drummond, who's all over the blog world and America itself these days, on the book tour of my dreams. She seems like such a good egg.
Here are some fun questions I ask of you. Am I the only one who...
...would rather try to carry ten grocery bags in each hand than make two trips?
...keeps some people’s phone numbers in my phone just so I know not to answer when they call?
...sometimes looks at the clock three consecutive times and still doesn’t know what time it is?
...has no idea how to fold a fitted sheet?
...wonders what would happen if Pinocchio said his nose was about to grow?
...feels a need for a sarcasm font?
...loves the sense of camaraderie when an entire line of cars teams up to prevent a jerk from cutting in at the front?
...finds cursive completely useless?
...wonders how many times it’s appropriate to say “What?” before you just nod and smile because you still didn’t hear what was said?
...hates leaving my house feeling confident and looking good and then not seeing anyone of importance the entire day?
November 17, 2009
equal opportunity chocolate-eater
That's right--I don't discriminate. Dark, bitter, milk, semi-sweet, white, I'll devour them all. I have my preferences, of course, but who doesn't?
I know there are some haters out there who strongly feel that white chocolate is inedible and make a big deal about the fact that it's actually not chocolate at all. I ask them, though, does anything pair with macadamia nuts as naturally and as marvelously as chunks of white chocolate? I don't think so. Is white chocolate raspberry cheesecake not a heaven-sent creation? Indeed it is. We mustn't ignore this creamy white confection, regardless of whether or not it's inappropriately-named.
Now that I've properly praised white chocolate, I can move on to my latest concoction. I've returned once again to the recipe making use of my sourdough starter and a pudding mix. Past versions have included oreo pudding and oreo bits, coconut cream pudding with macadamia nuts and white chocolate chips, and butterscotch pudding with dried apples. I can't help myself--it's the quickest and easiest way to use a fed Eb and it offers so much in the way of possible combinations.
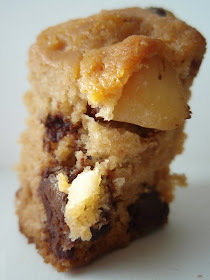
This time, I used some white chocolate pudding mix, macadamia nuts (even though I've already done something similar, I couldn't resist), and chocolate chips (semi-sweet, for the record, and just for the sake of those irrationally against white chocolate consumption). Soft, moist, chocolate-heavy, and with a salty crunch, this bread is everything a breakfast or even dessert loaf should be.
Whacadamia Nut (white chocolate + macadamia nut...get it?) Bread
1/2 cup oil
1/2 cup applesauce
1/2 cup milk
1 cup sourdough starter
3 eggs
1 teaspoon vanilla
1 cup sugar
2 cups flour
1 1/2 teaspoons baking powder
1 teaspoon cinnamon
1/2 teaspoon salt
1/2 teaspoon baking soda
2 (3.4 oz) boxes instant white chocolate pudding
1 cup chopped macadamia nuts
1 cup chocolate chips
Preheat oven to 325F. Grease down whatever molds you intend to use (I filled up 8 mini loaves).
In a large bowl, mix the oil, applesauce, eggs, milk, starter, vanilla, and sugar.
In a separate bowl, combine the flour, baking powder, cinnamon, salt, baking soda, pudding mix, nuts, and chips. Add this to the liquid mixture and stir thoroughly.
Pour the batter into the prepared pans and bake until done. Apparently, this takes at least an hour for regular loaves, and took around 45 minutes for my mini loaves. Cool completely before slicing.
Meanwhile, if you're unfamiliar with blonde ducks, you should head on over to A Duck in Her Pond and check it out.
Every post written by Miranda (affectionately known as the Blonde Duck) is awesome--she writes amazingly creative stories and displays good eats as far as the eye can see. There's also a little interview with me.
Behold, the Leaning Tower of Bread.
I know there are some haters out there who strongly feel that white chocolate is inedible and make a big deal about the fact that it's actually not chocolate at all. I ask them, though, does anything pair with macadamia nuts as naturally and as marvelously as chunks of white chocolate? I don't think so. Is white chocolate raspberry cheesecake not a heaven-sent creation? Indeed it is. We mustn't ignore this creamy white confection, regardless of whether or not it's inappropriately-named.
Now that I've properly praised white chocolate, I can move on to my latest concoction. I've returned once again to the recipe making use of my sourdough starter and a pudding mix. Past versions have included oreo pudding and oreo bits, coconut cream pudding with macadamia nuts and white chocolate chips, and butterscotch pudding with dried apples. I can't help myself--it's the quickest and easiest way to use a fed Eb and it offers so much in the way of possible combinations.
This time, I used some white chocolate pudding mix, macadamia nuts (even though I've already done something similar, I couldn't resist), and chocolate chips (semi-sweet, for the record, and just for the sake of those irrationally against white chocolate consumption). Soft, moist, chocolate-heavy, and with a salty crunch, this bread is everything a breakfast or even dessert loaf should be.
Whacadamia Nut (white chocolate + macadamia nut...get it?) Bread
1/2 cup oil
1/2 cup applesauce
1/2 cup milk
1 cup sourdough starter
3 eggs
1 teaspoon vanilla
1 cup sugar
2 cups flour
1 1/2 teaspoons baking powder
1 teaspoon cinnamon
1/2 teaspoon salt
1/2 teaspoon baking soda
2 (3.4 oz) boxes instant white chocolate pudding
1 cup chopped macadamia nuts
1 cup chocolate chips
Preheat oven to 325F. Grease down whatever molds you intend to use (I filled up 8 mini loaves).
In a large bowl, mix the oil, applesauce, eggs, milk, starter, vanilla, and sugar.
In a separate bowl, combine the flour, baking powder, cinnamon, salt, baking soda, pudding mix, nuts, and chips. Add this to the liquid mixture and stir thoroughly.
Pour the batter into the prepared pans and bake until done. Apparently, this takes at least an hour for regular loaves, and took around 45 minutes for my mini loaves. Cool completely before slicing.
Meanwhile, if you're unfamiliar with blonde ducks, you should head on over to A Duck in Her Pond and check it out.
Every post written by Miranda (affectionately known as the Blonde Duck) is awesome--she writes amazingly creative stories and displays good eats as far as the eye can see. There's also a little interview with me.
November 13, 2009
newfangled classic
How's that for an oxymoron on a Friday morning?
There aren't many pairings more traditional than grilled cheese and tomato soup. Having recently made some delectable tomato jam, I decided to combine the two components into one awesome foodstuff.
Oh, and if it saves on dish-washing, I'm all for it.
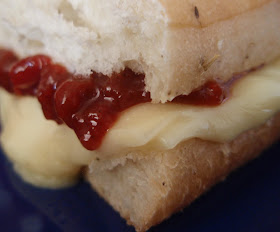
I simply took some rosemary focaccia bread (sadly, not homemade), added a thick layer of pepperjack (the end-all, be-all of cheeses in my book), and slathered on a hearty helping of that vibrant tomato jam. I melted some butter in my cast-iron skillet and grilled both sides until they were crispy-crunchy and nicely browned. It was awesome, an all-in-one delight--sweet, spicy, gooey, crusty, and chewy. Easy to clean up, too.
Any other suggestions for ways to use my tomato jam? Do tell!
And hey, watch out for black cats and broken mirrors today--it's Friday the 13th!
November 10, 2009
apple of my eye*
*What?!? I don't get it. I think I'll start saying "acai of my eye" instead, just for kicks. And because it rhymes.
I hope I'm never forced to pick my favorite fruit--it'd be way too hard. I love them all, really--bananas for a filling snack, blueberries for an enhanced yogurt-granola experience, dried cranberries for a tart and chewy salad addition, etc, etc. Right now, however, I think I most highly value the apple.
Pies, cobblers, crisps, cakes--is there any fruit dessert for which the apple is not appropriate? I submit that there is not. I've been down the road to Applecakeville once or twice before, but since it's a place I really enjoy visiting, I went back using a different route.
How do I describe this cake? Well folks, the air is dry. The skin on my hands is cracking and peeling and screaming for hourly lotion applications. My hair looks like I stuck my finger in an electrical socket. This cake, however, is so incredibly moist that it can easily combat all that desiccation.
While the moist-iosity is the defining characteristic of this cake for me, there are other redeeming qualities. The spices are redolent, the apples are softened yet still a tad toothy, the coconut (my addition) is crunchy and flavorful. It has a tender crumb, which is appropriate since I found the base recipe on Linda's awesome blog of the same name. Also, although the original recipe didn't originally call for apple butter**, it was a marvelous and valuable component if I do say so myself.
**Incidentally, apple butter is quickly becoming my favorite condiment, approaching and about to overtake pepper jelly. I shall enjoy letting the two fight it out.
Mega-Moist Muffin Cake
(inspired by this recipe)
1/2 cup milk
1 cup apple butter
1 egg
1 teaspoon vanilla
1/4 cup unsalted butter, melted and cooled
1 3/4 cup all-purpose flour
1/2 cup sugar
1/4 cup brown sugar
1 tablespoon baking powder
1/2 teaspoon baking soda
2 teaspoons cinnamon
1/2 teaspoon salt
3/4 cup old-fashioned oats
3 cups apples, diced
1 cup coconut, toasted
Preheat oven to 400F degrees. Spray down an 8x8-inch pan.
In a medium bowl, whisk together the milk, apple butter, egg, vanilla, and melted butter. In a separate large bowl, blend together the flour, sugar, brown sugar, baking powder, baking soda, cinnamon, salt, and oats to combine thoroughly. Using a large rubber spatula, pour the liquid mixture into the dry ingredients and mix only until combined (less is better). Fold in the diced apples and pour batter into prepared pan. Sprinkle the top with the toasted coconut.
Bake for 35-40 minutes, until the cake is golden brown and a knife inserted into the cake center comes out clean. Let cool before cutting into squares, rectangles, circles, or what-have-you.
November 5, 2009
sticky scrumtrulescence
If I start listing off ingredients like maple syrup, cinnamon, and butter, what probably first pops into your mind is pancakes. (Mmm. Pancakes.) That's the case with me, anyway. Those three components could clearly contribute great things to any number of dishes, am I right? This time, I chose to use their magic on butternut squarsh.
Yes, squarsh.
Process:
1) Wash, peel, deseed, destring-ify, and dice. The peeling is by far the most difficult part, and it's not that bad. Think of it as a pre-treat workout. Here's a quick tutorial.
2) Evenly coat the diced squarsh with a blessed mixture of melted butter, maple syrup, cinnamon, salt, and pepper to taste.
3) Roast at 350F or so for around 30 minutes, or until the goodies are fork-tender.
What a treat this is. Would I rather have pancakes? Maybe. Probably. The point is, if you haven't tried this slimy, satisfying, and yes, scrumtrulescent squash preparation, you must do so posthaste! Posthaste, I say!
November 2, 2009
"change is inevitable...
...except from a vending machine."
I love that.
The proof is in the pudding, or in this case, the gingerbread. If ever there was any question that a person's tastes change over time, I've selflessly stepped up and provided an example of it.
Let's wander back to last year, when I made a batch of sourdoughginger gingammonbread. Even with a lovely glaze, I found it difficult to really enjoy. Fast forward to last week and a similar recipe. Wonder of wonders, I liked it, even without a glaze! It was moist and fragrant, sweet and a little bit tangy. Granted, a robust cinnamon scent would've been preferred, but hey--a bit of ginger's all right every now and then.
See that? I'm growing.
Mendenhall (what the heck is that?) Sourdough Gingamuffins
(adapted from this recipe)
1/2 cup butter
1/2 cup brown sugar, firmly packed
1/2 cup molasses
1 egg
1 1/2 cups all-purpose flour
1/2 teaspoon salt
1 teaspoon baking soda
2 teaspoons ginger
2 teaspoons cinnamon
1/2 cup hot water
1 cup sourdough starter
1 cup dried fruit (I used cranberries and golden raisins)
Preheat oven to 375F. Line a muffin tin with cups.
In a large bowl, cream together the brown sugar and butter. Blend in the molasses and the egg, beating continuously; set aside.
In a separate bowl, combine the dry ingredients together and blend into hot water. This will yield a pasty, doughy mixture. Beat this thoroughly into the creamed mixture.
Finally, add the sourdough starter slowly, mixing carefully to maintain a bubbly batter. Dust the dried fruit with flour and lightly fold into the batter. Spoon or pour the mixture into the muffin cups and bake about 20 minutes or until a tester comes out clean.
My ginger of choice:
I love that.
The proof is in the pudding, or in this case, the gingerbread. If ever there was any question that a person's tastes change over time, I've selflessly stepped up and provided an example of it.
Let's wander back to last year, when I made a batch of sourdough
See that? I'm growing.
(adapted from this recipe)
1/2 cup butter
1/2 cup brown sugar, firmly packed
1/2 cup molasses
1 egg
1 1/2 cups all-purpose flour
1/2 teaspoon salt
1 teaspoon baking soda
2 teaspoons ginger
2 teaspoons cinnamon
1/2 cup hot water
1 cup sourdough starter
1 cup dried fruit (I used cranberries and golden raisins)
Preheat oven to 375F. Line a muffin tin with cups.
In a large bowl, cream together the brown sugar and butter. Blend in the molasses and the egg, beating continuously; set aside.
In a separate bowl, combine the dry ingredients together and blend into hot water. This will yield a pasty, doughy mixture. Beat this thoroughly into the creamed mixture.
Finally, add the sourdough starter slowly, mixing carefully to maintain a bubbly batter. Dust the dried fruit with flour and lightly fold into the batter. Spoon or pour the mixture into the muffin cups and bake about 20 minutes or until a tester comes out clean.
My ginger of choice:
October 29, 2009
boo, i say. boo.
Not "Boooooo!" like the noise an unhappy crowd makes, but "BOO! Boogity-oogity!" in the scare-some-hapless-kids-into-wetting-themselves sense. That's what I meant.
Not that I would intentionally do such a thing, of course.
We all know that I'm not the most creative person, so my offering for Halloween this year relies heavily on the random colors associated with the holiday. I made fudge, and I made it to be black and orange. Isn't that clever? I'm actually quite proud of myself.
I know this recipe by the name Easy Bars, and I have a story to share:
In elementary school, we had to occasionally give presentations to our classmates, teacher, and some judges from around the community. One year, I decided I would present the preparation of a tasty and aptly-named treat called Easy Bars.
It's important to note that one hard and fast rule for any food presentations was to never lick your fingers or utensils. I knew this. However, I became so flustered at one point that I stuck pretty much my entire chocolate-covered fist into my mouth. Can we say humiliation? I think so. I painfully groped my way to the end of my spiel and promptly bolted to the bathroom in tears.
After I had pulled myself together a few hours later, I came back and offered the judges some of the finished product, giving the excuse that I had waited to serve the goodies because I didn't want to spoil their lunches (even as a child I was pretty shrewd). I got a blue ribbon.
Thus marked the beginning of the end of my career as a public speaker.
These are good. These are simple. Make them, but don't lick your fingers. And have a thrilling Halloween.
Easy Bars, Halloween-Style
Black:
1/2 cup peanut (or almond) butter
1/4 cup margarine
1 cup chocolate chips
1 teaspoon vanilla
1/2 bag mini marshmallows
Orange:
1/2 cup peanut (or almond) butter
1/4 cup margarine
1 cup butterscotch chips
1 teaspoon vanilla
1/2 bag mini marshmallows
For each layer, do the following:
Melt the peanut butter, margarine, and chips in the microwave and mix until smooth. Do not lick your spatula. Stir in the vanilla. Do not lick your spatula. Fold in the marshmallows and mix well. Do not lick your spatula. Dump into a buttered or lined 9x9 pan. The order of the layers is completely up to you. Place in the fridge until set and slice into squares. Now you may lick your spatula.
October 26, 2009
tnt, tomato-style
Never in a million years would I have expected the sweet, subtle flavor of tomatoes to morph into something with such a wallop-packing punch after just a few hours of cooking down.
Explosive, I tell you. Dy-no-mite.
I returned from Pennsylvania with a load of tomatoes from my grandpa's garden, and although I tried my hardest to eat them before they turned to the dark side, I eventually accepted that it would never happen. When I began searching for ways to use them, I focused mainly on things other than your typical tomato soup, gazpacho, salsa, and the like. My interest immediately drifted toward condiments. I considered making some spicy ketchup or tangy chutney, but I ultimately couldn't get past the notion of a sweet tomato jam.
Sweet and spicy, to be exact. There's brown sugar and cinnamon on one hand, and diced serrano pepper and dried red chile flakes on the other. This stuff cooked and cooked and cooked, and FINALLY after about two hours, the liquid had vanished and left me with a thick, full-o-flavor spread.
Punch-Packin' To-mah-to Jam
(based on this recipe from one awesomely dynamic duo)
1 lb tomatoes, peeled, seeded, and roughly chopped
3/4 c brown sugar
1 hot pepper, seeded and finely diced
1 tablespoon red pepper flakes
1 tablespoon cinnamon
3 tablespoons red wine vinegar (more or less to taste)
1/2 cup fresh lime juice
Combine all the ingredients in a saucepan and simmer over medium-low heat. Stir occasionally and gently. Cook about two hours or until the mixture thickens to a jam-like consistency. This all depends on how juicy your tomatoes are and the amounts of liquids added.
Spoon the tomato jam into sterilized jars. For longer storage, can in a water bath (cover with water about 1″ above jars and simmer for about 15 minutes) or just store in the fridge a couple of weeks.
October 19, 2009
facing the first frost
There was frost covering my windshield every morning last week. The vile, bitter cold has officially arrived, and I'm not happy about it.
Aside from contributing to my misery, cold weather also triggers another reaction--a craving for hot chocolate. I have in my possession about five winters' worth of mixes, including interesting (and delicious) flavors like chocolate hazelnut and mint chocolate. The second I saw Peabody's post about a cake making use of hot chocolate mix, I set out to make a batch for myself.
Since I'd be taking these baked goodies to work, I chose to use my least favorite hot chocolate flavor in the cake. Any guesses as to which flavor I don't particularly like? If you guessed chocolate raspberry, you win! I usually like the combination, but that artificial raspberry flavoring is just downright nasty. I doubted my co-workers would mind--I'm seriously convinced they'll eat anything.
This was a groovy cake. The chocolate chips sank to the bottom (even though I floured them) and the marshmallows migrated to the top, forming a sticky, crusty shell. The cake itself was the teeniest bit dry and would certainly have benefited from Peabody's glaze, but since I wanted to make it eat-and-run-friendly, I skipped that part. If you ask me, this is the best possible use for raspberry-flavored hot chocolate mix--it seemed to make the faux flavor much more tolerable. Dare I say it? Tasty, even.
Hot Chocolate Cake (with a Hint of Not-Real Raspberry)
(based heavily on this recipe)
1/2 cup butter or margarine, at room temperature
1 1/4 cups granulated sugar
2 eggs
1 egg yolk
1/2 cup buttermilk
1 teaspoon vanilla
1 1/2 cups all-purpose flour
3/4 cup hot chocolate mix
1/2 teaspoon salt
1/2 teaspoon baking powder
1 cup semi-sweet chocolate chips
1 cup mini marshmallows
Preheat oven to 350F. Spray a pan of mini-loaf molds.
In a large bowl, cream together the butter and sugar until light and fluffy, about 3 minutes. Add the eggs and egg yolk one at a time, beating between each addition.
In a small bowl, sift together the hot chocolate mix, flour, salt, and baking powder. In another small bowl, mix together the buttermilk and vanilla.
Blend half of the dry ingredients into the creamed mixture. Add the buttermilk mixture and beat. Mix in the rest of the dry ingredients until just combined. Coat the chocolate chips and marshmallows with flour and fold into the batter.
Divide the batter evenly among the molds. Bake for 45-50 minutes, or until a cake tester comes out clean.
October 14, 2009
a flibbertijibbet! a will-o'-the-wisp! a clown!
Prepare yourself for the most convoluted post ever. Don't say I didn't warn you.
Oh, I have such undying love for The Sound of Music.** The soundtrack is one of the first CDs I owned, and I still listen to it all the time. One of my favorite songs is "Do-Re-Mi," the selection Maria uses to teach the youngsters how to sing. It’s clearly a miracle-working diddy, as they all picked it up in no time even though they hadn't ever sung a note...
What’s my point? Do-Re-Me-Fa-Sol-La-Ti-Do. Tea, a drink with jam and bread. I made jam. See the connection? It’s so obvious IF you know your song lyrics.
No, it's not even obvious then. Convoluted, see?
Truth be told, I've never had tea with jam and bread (or schnitzel with noodles)--I'm not a big tea drinker. I just saw the movie for the 290th time and the song was fresh on my mind. I did make jam, though, and I had it with bread.
I hope there's a song from The Sound of Music stuck in your head now. Any song will do. With that, I bid you auf wiedersehen, adieu. Adieu, adieu, to you and you and you.
**If you've never seen this movie, my apologies--I understand that the majority of this post makes absolutely no sense to you. My advice to you is to a)see the movie, and b)enjoy the picture of some tasty jam.
Fuss-Free Blueberry Freezer Jam
(from Ball)
4 cups crushed blueberries
1 1/2 cups sugar
1 1.59-ounce package of Ball Freezer Jam Fruit Pectin
Combine the sugar and contents of package in a large bowl and mix until well blended. Stir in the crushed fruit and mix for 3 more minutes. Ladle the jam into clean jars up to fill line. Twist on the lids and let stand until thickened, about 30 minutes.
October 9, 2009
the picture of purity
Sadly, it was impossible for someone of my limited photography skills to capture the pure, pristine whiteness of this cake with a mere digital camera. I guess you need two eyeballs (or maybe even just one) and a first-person viewing for that to happen.
Or maybe I just need to work on my picture-taking.
Regardless, you'll just have to take my word for the fact that this cake is beautiful. Tasty, too. After all, it's pound cake (which is clearly a grand concoction on its own, what with its dense texture, balanced sweetness, and fine crumb) slathered with a fluffy, smooth cream cheese frosting (unbeatable, and that's the end of that argument) and sprinkled with coconut (perhaps the most tasty of all meats)(just kidding)(or am I?).
It must be said that I usually prefer my coconut toasted, but in this instance, I wanted the as-clean-as-untouched-snow appearance to remain. Little speckles of brown really kinda takes away from that, don't you think? Kinda like yellow spots in otherwise white snow...
Coconut-Crusted Sour Cream Pound Cake
(from good ol' Paula Deen)
1 cup (2 sticks) butter
3 cups sugar
1 cup sour cream
1/2 teaspoon baking soda
3 cups all-purpose flour
6 eggs
1 teaspoon vanilla
Cream Cheese Frosting
2 cups coconut
Preheat oven to 325F.
Grease and flour a 10-inch tube pan.
In a large bowl, cream together the butter and sugar. Add the sour cream and mix until incorporated. In a smaller bowl, sift the baking soda and flour together. Add to the creamed mixture alternating with eggs, adding one at a time and beating in between. Mix in the vanilla and pour the mixture into the prepared pan. Bake for around 1 hour 20 minutes.
After cake has cooled, slather top and sides with as much cream cheese frosting as you can.Sprinkle Shower with the coconut.
Or maybe I just need to work on my picture-taking.
Regardless, you'll just have to take my word for the fact that this cake is beautiful. Tasty, too. After all, it's pound cake (which is clearly a grand concoction on its own, what with its dense texture, balanced sweetness, and fine crumb) slathered with a fluffy, smooth cream cheese frosting (unbeatable, and that's the end of that argument) and sprinkled with coconut (perhaps the most tasty of all meats)(just kidding)(or am I?).
It must be said that I usually prefer my coconut toasted, but in this instance, I wanted the as-clean-as-untouched-snow appearance to remain. Little speckles of brown really kinda takes away from that, don't you think? Kinda like yellow spots in otherwise white snow...
Coconut-Crusted Sour Cream Pound Cake
(from good ol' Paula Deen)
1 cup (2 sticks) butter
3 cups sugar
1 cup sour cream
1/2 teaspoon baking soda
3 cups all-purpose flour
6 eggs
1 teaspoon vanilla
Cream Cheese Frosting
2 cups coconut
Preheat oven to 325F.
Grease and flour a 10-inch tube pan.
In a large bowl, cream together the butter and sugar. Add the sour cream and mix until incorporated. In a smaller bowl, sift the baking soda and flour together. Add to the creamed mixture alternating with eggs, adding one at a time and beating in between. Mix in the vanilla and pour the mixture into the prepared pan. Bake for around 1 hour 20 minutes.
After cake has cooled, slather top and sides with as much cream cheese frosting as you can.
October 6, 2009
spudnik
If you'd like to learn a little more about me and my love for the creamy goodness known as mashed potatoes, check out the guest post I did for 4 Reluctant Entertainers, a fabulous blog full of useful tips and treasures.
Did I mention mashed potatoes?
October 3, 2009
ali baba
Alternate title: SEARCH OVER.
I’m so glad I took on this quest for the ultimate chicken pita wrap. I’ve been eating some good food, seeing some interesting places (and taking some inadvertent tours), and meeting some really kind people. My latest excursion took me to a place I’d visited before--Ali Baba, eatery of the angry, hirsute man.
I didn’t dare take my camera with me this time, but it wouldn’t have mattered--the owner wasn’t there this time. The place hasn’t changed at all since my first visit, and I was especially elated to see the wood-fired oven (more on that later). I promptly placed my order for the chicken durum wrap, sauce on the side ($6.45 + tax). I also failed to resist the small appetizer plate, which included portions of five appetizers of your choice ($9.95 + tax). Variety may be the spice of life, but I think my life is sufficiently seasoned--I got two parts hummus, two parts ezme (super spicy tomato dip), and one part barbunya (giant white beans drenched* in olive oil and spices).
*Yeah, “drenched” may be an understatement. I went ahead and poured most of that grease off.
Far and away, the highlight of my day was watching the bread-making process. It began with the Breadmaster (as I’ve taken it upon myself to dub him) hacking off a bit of premade dough and rolling it into the perfect size and thickness for optimum puffing. To give you an idea of its elasticity, I witnessed him pick up the rolled dough and a whip it like you whip a wet shirt to get the wrinkles out. (Amusingly, he did this in the face of the kid hanging around the kitchen, flicking flour all over him.) He must roll out hundreds of those things each day, and he certainly has it down to an art.
Massive, providing many a moment of savory chew-phoria.
After rolling and flicking the dough, he sprinkled on some nigella seeds, placed it on a wooden paddle and slid it into the 460F wood-fired oven. This is the point at which I became mesmerized, spellbound, and completely captivated. The puffing is simply extraordinary--the totally flat disc becomes this perfect round ball of soft, pliable bread. I could be entertained for hours by this process, as long as I was fed a steady supply of said bread.
I’ll be honest--part of the reason I got the appetizer plate was so I could get another piece of lavash. You can imagine my disappointment when I realized it came with a smaller, thicker piece instead. Regardless of that downer, I still enjoyed what I was given.
The thicker bread was actually better for scooping up the hummus (a little bland) and ezme (it set my mouth on fire, so I loved it). The beans were scrumptious—slightly sweet and cooked to the point where they actually melted in my mouth, no chewing required.
Now, the point of my visit--the wrap. Apparently, the man misunderstood my request for sauce on the side, giving me extra sauce while still slathering the innards with it. So much for consistency within my reviews, but it was so darned delicious, I didn’t care. Perfectly creamy and dilled, with just enough garlic to let me know it was there. Although the glorious, matchless bread burst at some point in the making, I managed to devour the entire wrap with no problems. The chicken was moist and only very lightly seasoned, but that just gave me an excuse to use more sauce.
This is one terrific restaurant and I won’t be waiting another year to visit again. In fact, I expect to order exactly the same thing (with an extra piece of lavash on the side).
Ali Baba
2243 15th St.
Troy, NY 12180