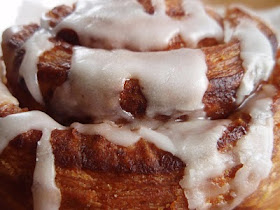
...and cinnamon roll too.
Cinnamon. Roll. Cake. Can you believe I only made this for the first time a few weeks ago? There's no excuse for my behavior--it's completely unacceptable. To ignore such a magnificent and effortless creation is a travesty, plain and simple. As punishment, I should be force-fed more cake. That'll teach me.
All right, so it doesn't really taste like a cinnamon roll--there's no bready, yeasty characteristic of which to speak. In fact, upon my first bite, I immediately likened it to the warm cinnamon roll shooters from Chili's. Have you tried them? As far as I can tell, those little cups of heaven consist of layers of streuseled coffee cake and cinnamon-powdered sugar glaze. (Not a bad idea, right? Kudos, Chili's!)
Even though this cake is clearly different from your standard cinnamon roll in texture and flavor, it's similar in that cinnamon is the star (as it should be). When you hit a pocket of that sugary cinnamon streusel while also getting a taste of the cake and glaze, the result is a perfect sweet and spicy bite.
Did I like this? I think it's fairly obvious that the answer is a resounding YES.
Cinnamon Roll Shooters in Cake Form
Cake:
1 box of yellow cake mix
4 eggs
¾ cup oil
1 cup sour cream (I used 1 cup of yogurt + 1 teaspoon of baking soda)
1 cup brown sugar
1 tablespoon cinnamon
Icing:
2 cups powdered sugar, sifted
3-4 tablespoons milk
Preheat oven to 325F and grease a 13x9-inch baking pan.
Mix the first four ingredients by hand and pour into the prepared pan.
In a small bowl, combine the brown sugar and cinnamon and sprinkle it over the cake batter. Swirl decoratively with a knife.
Bake for 40-50 minutes and let it cool briefly before adding the icing.
To make the icing, stir together the sugar and milk until smooth, adding more milk as needed. Pour over the warm cake.
January 29, 2010
January 26, 2010
a surefire hit
"Roll in sugar." If you see that step in a list of recipe instructions, it's a pretty good bet that you have a winner on your hands.
After all, if we're talking about cookies (as we so often are), the result is a crunchy coating that hits the tongue first and explodes with sweetness before giving way to the central flavor of the little saucers.
The pucks of pleasure being brought to you in this post are a specialty of Mamma-jamma. For as long as I can remember, she's made these molasses cookies at some point during the Christmas season, as well as occasional instances throughout the year. I consider them to be somewhat magical because even though molasses is a flavor I don't find particularly enjoyable, neither wind nor rain nor dark of night could keep me from these soft, chewy, and aromatic discs.
The spicing is key. My favorite mother manages to find the perfect balance of cinnamon, cloves, and ginger, causing the smell to yield almost as much satisfaction as the taste.
Truly, rolling cookie dough in sugar is one of the finest things you can do to it. That one simple step pretty much ensures that a delicious (and pretty) product will result.
Magical Molasses Cookies3/4 cup (145 g) shortening, melted and slightly cooled
1 cup granulated sugar
1 egg
1/4 cup (80 g) molasses (I've been using Grandma's brand)
1 teaspoon vanilla extract
2 1/2 cups (350 g) all-purpose flour
2 teaspoons baking soda
1/2 teaspoon salt
1 teaspoon ground cinnamon
1/2 teaspoon ground cloves
1/2 teaspoon ground ginger
1/2 cup granulated sugar
Directions:
In a medium bowl, beat together the melted shortening, sugar, egg, and molasses. In a separate bowl, combine the flour, baking soda, salt, cinnamon, cloves, and ginger; blend into the molasses mixture. Cover and chill the dough for 1 hour.
Preheat oven to 375F. Form the dough into one-inch balls, and give 'em a good roll in the remaining sugar. Place the cookies onto ungreased baking sheets and bake for 8 to 10 minutes, until tops are cracked. Cool on wire racks.
Magical Molasses Cookies
January 22, 2010
have i told you lately...
...that i'm lazy?
'Cause I am.
Case in point: Cinnamon rolls. They're one of my favorite things for breakfast, if not the tippy-top dog (which should come as no surprise, since about 90% of my posts involve that enchanting, and soothing spice), but I rarely find the motivation to make them for myself.
Fortunately, I've found a local bakery that makes a sensational sampling. Each roll has just the right amount of flakiness, a wonderful balance of cinnamon and butter, and the perfect dose of sugary glaze. This discovery is dangerous, for the place is right down the road and very reasonably-priced...
Dang it. How can I resist?
Do you have a go-to cinnamon roll recipe? Better yet, one that requires little effort? Do tell! And while you're at it, what makes a cinnamon roll different from a cinnamon bun? I've always wondered.
January 19, 2010
this little piggy...
...looks good in orange. Am I right or am I right?
So. Every pig-lover out there would probably agree that nothing goes together quite as well as pork and apples. Some might argue for the tangy juice of orange or pineapple, others might make a case for pears. One fruit I never considered is the unassuming apricot.
Folks, this rub and glaze combination is nothing short of amazing. Fresh rosemary is so fragrant and the sweet burst of flavor from the apricot preserves compliments the juicy pork perfectly. If you're anything like me, you'll be reaching for a second helping almost immediately--Heaven forbid someone beat you to it!
Have you found any other off-the-wall fruits that seem to enhance Miss Piggy?
Aromatic Apricot Loin of Pork
(based almost entirely on this recipe)
1 pound pork tenderloin
2 tablespoons olive oil
3 tablespoons fresh rosemary, finely-minced (or 1 tablespoon dried)(but fresh is really much better)
2 garlic cloves, minced
Fresh ground black pepper and salt
3/4 cup apricot preserves
1 tablespoon lemon juice
Preheat oven to 400F.
Brush the pork with 1 tablespoon oil; sprinkle with rosemary, garlic, salt, and pepper. Heat the remaining tablespoon of oil in a large ovenproof skillet over medium-high heat. Add the pork and cook until brown on all sides, turning often (about 5 minutes). Transfer the pan to the oven and roast the pork until a meat thermometer registers 150F (about 15 minutes).
While the pork roasts, combine the preserves and lemon juice in a small bowl.
When the meat has reached the appropriate temperature, remove the pan from the oven and brush the preseves mixture over the pork. Let your gorgeous slab of meat rest 8 minutes the cut it crosswise into 1/4-inch-thick slices. Drizzle any remaining sauce on top--it's much too tasty to waste!
January 14, 2010
i prefer bales.
I grew up knowing a thing or two about farming--my uncles and grandfather own a good portion of land on which they've grown corn and hay and raised sheep, chickens, beef cows, and dairy cows. That said, although I've never seen a legitimate haystack, I don't think they look like this:
Nope, my family prefers the bale--round or square. I hefted my fair share of the those square suckers onto the wagon as the baler spit them out. Ah, fond memories. Fond memories of scratched forearms and dust-filled nasal cavities. Fond memories of accidentally stepping in cow patties (that's mounds o' manure, for the uninitiated) and wagons full of hay bales tipping over. Fond, fond memories.
But I digress! Although failing to resemble any harvest of hay that I've ever seen, this treat is delicious. Butterscotch morsels (to which I'm completely addicted even though they taste nothing like true butterscotch), peanut butter, marshmallows, and chow mein noodles. Easy, straightforward, quick, and scrumptious--almost too good to be true.
Butterscotch Stacks o' Hay (for the baleless among us)
1 2/3 cups (11 oz) butterscotch morsels
3/4 cup creamy peanut butter
8 oz chow mein noodles
3 1/2 cups miniature marshmallows
Line several trays with wax paper.
Microwave the butterscotch morsels and peanut butter in a large bowl for one minute and stir. If necessary, microwave at additional 10- to 15-second intervals, stirring just until morsels are melted. Add the chow mein noodles and marshmallows and toss until all the ingredients are evenly coated. Drop by haystack-shaped tablespoons onto the prepared trays. Store in a cool place or refrigerate until ready to serve.
Looks more like a spider to me. A spider with a couple of tumors.
It's not a toomah!
It's not a toomah!
Nope, my family prefers the bale--round or square. I hefted my fair share of the those square suckers onto the wagon as the baler spit them out. Ah, fond memories. Fond memories of scratched forearms and dust-filled nasal cavities. Fond memories of accidentally stepping in cow patties (that's mounds o' manure, for the uninitiated) and wagons full of hay bales tipping over. Fond, fond memories.
But I digress! Although failing to resemble any harvest of hay that I've ever seen, this treat is delicious. Butterscotch morsels (to which I'm completely addicted even though they taste nothing like true butterscotch), peanut butter, marshmallows, and chow mein noodles. Easy, straightforward, quick, and scrumptious--almost too good to be true.
Butterscotch Stacks o' Hay (for the baleless among us)
1 2/3 cups (11 oz) butterscotch morsels
3/4 cup creamy peanut butter
8 oz chow mein noodles
3 1/2 cups miniature marshmallows
Line several trays with wax paper.
Microwave the butterscotch morsels and peanut butter in a large bowl for one minute and stir. If necessary, microwave at additional 10- to 15-second intervals, stirring just until morsels are melted. Add the chow mein noodles and marshmallows and toss until all the ingredients are evenly coated. Drop by haystack-shaped tablespoons onto the prepared trays. Store in a cool place or refrigerate until ready to serve.
January 10, 2010
the rest is just gravy
I could eat the dish you see before you thrice weekly for the rest of my days. In my eyes, the good luck it's supposed to bring is just a gratifying bonus.
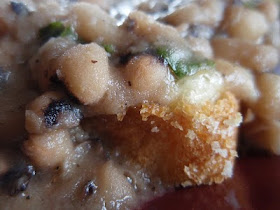
Black-eyed peas. In their unseasoned and unflavored state, there's certainly nothing spectacular or special about them (other than their tell-tale periorbital hematomas)(yeah, I said it). However, there are a few key components that were added to this particular batch that make them utterly irresistible (I've eaten them for four days straight). What could these magical ingredients be, you ask? Cilantro and ham hock.
Cilantro is hands-down my favorite herb, so I'm sorry for those of you who find it revolting. It contributed a wonderfully fresh and vibrant flavor to the peas. Further, the inherent yumminess of the ham hock managed to seep into every single pea as they simmered on the stove and resulted in a slightly salty, oh-so-tender and rich mess o' legumes. I ate mine over some toasted sourdough drowned in pepper jack cheese (and felt warmer than I had for days).
Cumin and dry mustard were also involved, but to a lesser extent--their notes were subtle but definitely appreciated. All in all, this was just a masterful dish that hit all the right spots. Comfort food, defined.
Southern-Style Peas with Shiners
(makes a whole heck of a lot, which is great because they're even better reheated)
(trust me, after four repeats, this much I know)
2 cups dried black-eyed peas
5 cups water, broth, or some combination thereof
1 ham hock
2 teaspoons cumin
2 teaspoons dry mustard
salt and pepper, to taste
2 cups cilantro, coarsely chopped
Place black-eyed peas in a large pot. Cover with enough water to be about 2-inches deep over peas (anywhere from 6-8 cups). Bring to a boil, boil for 3 minutes, and remove from heat. Cover and allow to sit for 1 hour. Drain water off of black-eyed peas.
Add the liquid, ham hock, cumin, mustard, salt, and pepper to the black-eyed peas and bring to a boil. Reduce the heat and cook, covered, for about 1 hour, or until the peas are tender, stirring occasionally. To finish, stir in the chopped cilantro and serve over some nice, hearty bread.
January 5, 2010
a beany breakfast
Yes, you read correctly. I put beans in my waffles.
If you're sharp like a scimitar, you already guessed that I'm talking about vanilla beans. Justin, a stellar feller from Marx Foods, arranged for the wholesale company to send me a sample of its vanilla beans. I promptly got two varieties--Madagascar and Tahitian.
I'd been hanging onto the beans but never forgetting about them, waiting for the perfect place to try them out. When we decided to have waffles on the first morning of 2010, it occurred to me that they'd be an ideal place for some robust vanilla flavor.
I was right. The waffle batter, while good, really benefited from the boost of vanilla bean. (I used the Madagascar variety, simply because the name lists bourbon in parentheses. Was that wrong?) I love the fleckage, too--so picturesque and attractive. Thanks, Justin--now that I've had a taste, I can't wait to try the beans in other recipes!
For the record, I slathered one half of my waffle with peanut butter and maple syrup while the other half received a dousing of homemade strawberry preserves. Yep, I guess I essentially greeted the new year with a peanut butter and jelly sandwich smothered in maple syrup. 'Twas a good start indeed.
Wanilla Vaffles
(makes 4 vaffles)
1 3/4 cups all-purpose flour
2 tablespoons sugar
1 tablespoon baking powder
1 teaspoon cinnamon
2 eggs
1 3/4 cups milk
1/2 cup oil or melted butter
2 vanilla beans
In a large bowl, mix together the flour, sugar, baking powder, and cinnamon. In a separate bowl, combine the eggs, milk, and fat. Add this mixture to the dry ingredients, stirring just until moistened. Whisk in the vanilla bean seeds until evenly distributed.
Pour batter onto your preheated, greased waffle iron and bake according to manufacturer's instructions. Serve immediately with plenty of preserves, syrup, butter, and whatever else might float your boat, flip your ship, or crack your kayak.
(Disclaimer: Although it appears that way, the flecks have not been added using Photoshop.)
If you're sharp like a scimitar, you already guessed that I'm talking about vanilla beans. Justin, a stellar feller from Marx Foods, arranged for the wholesale company to send me a sample of its vanilla beans. I promptly got two varieties--Madagascar and Tahitian.
I'd been hanging onto the beans but never forgetting about them, waiting for the perfect place to try them out. When we decided to have waffles on the first morning of 2010, it occurred to me that they'd be an ideal place for some robust vanilla flavor.
I was right. The waffle batter, while good, really benefited from the boost of vanilla bean. (I used the Madagascar variety, simply because the name lists bourbon in parentheses. Was that wrong?) I love the fleckage, too--so picturesque and attractive. Thanks, Justin--now that I've had a taste, I can't wait to try the beans in other recipes!
For the record, I slathered one half of my waffle with peanut butter and maple syrup while the other half received a dousing of homemade strawberry preserves. Yep, I guess I essentially greeted the new year with a peanut butter and jelly sandwich smothered in maple syrup. 'Twas a good start indeed.
Wanilla Vaffles
(makes 4 vaffles)
1 3/4 cups all-purpose flour
2 tablespoons sugar
1 tablespoon baking powder
1 teaspoon cinnamon
2 eggs
1 3/4 cups milk
1/2 cup oil or melted butter
2 vanilla beans
In a large bowl, mix together the flour, sugar, baking powder, and cinnamon. In a separate bowl, combine the eggs, milk, and fat. Add this mixture to the dry ingredients, stirring just until moistened. Whisk in the vanilla bean seeds until evenly distributed.
Pour batter onto your preheated, greased waffle iron and bake according to manufacturer's instructions. Serve immediately with plenty of preserves, syrup, butter, and whatever else might float your boat, flip your ship, or crack your kayak.
January 2, 2010
who's up for a game of chess?
Gooey Butter Cake. Chess Bars. News flash: They're almost one and the same.
Really, I had no idea. Until my brothers requested some chess bars after having them at one of our holiday gatherings, I didn't have a clue what went into them. I was surprised (and thrilled) that, except for one notable exception, the ingredients are exactly the same as those of the decadent gooey butter cake, made most famous by Ms. Paula Deen. That exception? Paula puts another stick of butter into the cream cheese filling. Geez, Paula. Give your arteries a break--the bars are rich enough!
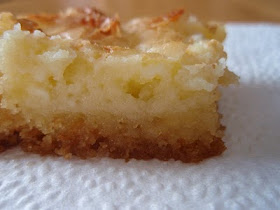
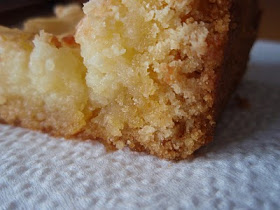
Nope, there's no way you can go wrong with something so simple, containing so few (high quality) components. This treat is quick work to make and even quicker work to consume. My family's attack on the bars was interesting--both of my brothers drifted toward the edge pieces...
(I guess they liked the more cakey aspect of it. A gender thing, perhaps?)
...while my sister-in-law and I preferred the ooey-gooey-gunky center pieces. Yep, it all worked out quite nicely.
Chess Bars (not to be confused with Paula's over-the-top Gooey Butter Cake)
Cake:
1 18 1/4-ounce package yellow cake mix
1 egg
8 tablespoons butter, melted
Filling:
1 8-ounce package cream cheese, softened (I used low-fat, for what it's worth)
2 eggs
1 teaspoon vanilla
3 3/4 cups (1 16-ounce box) powdered sugar
Preheat oven to 350 degrees F.
Combine the cake mix, egg, and butter and mix well with an electric mixer. Spread the mixture into the bottom of a lightly greased 13x9-inch baking pan.
In a large bowl, beat the softened cream cheese until smooth. Add the eggs and vanilla and beat together. Carefully add the powdered sugar and mix well. Spread this evenly over the cake batter and bake for 40 to 50 minutes. Make sure not to over-bake--some of us want the the center to bea little immensely luscious and gooey.
Really, I had no idea. Until my brothers requested some chess bars after having them at one of our holiday gatherings, I didn't have a clue what went into them. I was surprised (and thrilled) that, except for one notable exception, the ingredients are exactly the same as those of the decadent gooey butter cake, made most famous by Ms. Paula Deen. That exception? Paula puts another stick of butter into the cream cheese filling. Geez, Paula. Give your arteries a break--the bars are rich enough!
Nope, there's no way you can go wrong with something so simple, containing so few (high quality) components. This treat is quick work to make and even quicker work to consume. My family's attack on the bars was interesting--both of my brothers drifted toward the edge pieces...
(I guess they liked the more cakey aspect of it. A gender thing, perhaps?)
...while my sister-in-law and I preferred the ooey-gooey-gunky center pieces. Yep, it all worked out quite nicely.
Chess Bars (not to be confused with Paula's over-the-top Gooey Butter Cake)
Cake:
1 18 1/4-ounce package yellow cake mix
1 egg
8 tablespoons butter, melted
Filling:
1 8-ounce package cream cheese, softened (I used low-fat, for what it's worth)
2 eggs
1 teaspoon vanilla
3 3/4 cups (1 16-ounce box) powdered sugar
Preheat oven to 350 degrees F.
Combine the cake mix, egg, and butter and mix well with an electric mixer. Spread the mixture into the bottom of a lightly greased 13x9-inch baking pan.
In a large bowl, beat the softened cream cheese until smooth. Add the eggs and vanilla and beat together. Carefully add the powdered sugar and mix well. Spread this evenly over the cake batter and bake for 40 to 50 minutes. Make sure not to over-bake--some of us want the the center to be